Minecraft Crop Farming Guide: Every Minecraft player needs food and shelter for survival. You might be dependent on the animals around you for food in Minecraft but you can also grow your crops in the game so you can have more food with you. Today we will give you a complete guide on how to grow crops in Minecraft.
All Growable Crops in Minecraft
Before learning how to grow crops in Minecraft you should learn about the types of crops that are available to grow in the game. We will List down the different types of crops and where to find their specific seeds down below.
- Wheat: You can break grass to find the Wheat seeds.
- Carrot: Found in villages and shipwrecks.
- Potatoes: Found in villages, shipwrecks, and planted on farmland.
- Beetroot: Found in villages, mineshaft chests, and End City chests.
- Pumpkin: Found in mineshaft chests, in plains, and in forest biomes.
- Melon: Found in mineshaft chests, jungle biomes, and savanna villages.
- Sugar cane: These are found near water and most commonly in desert biomes.
- Bamboo: Found in jungle biomes or shipwrecks as loot.
- Cocoa beans: Found in jungle biomes.
- Cactus: Found in desert biomes and badlands.
- Mushrooms: Found in forests, caves, and the nether.
- Sweet berries: Found in taiga biomes.
- Kelp: Found Underwater.
- Sea pickle: Found Underwater.
- Nether wart: Found in Nether Fortress and some Bastion chests and structures.
- Chorus fruit: Found in the End.
- Nether fungus: Found in the Nether.
There are a lot of crops to choose from in Minecraft. So first you need to find the seed of the crop you want to grow. Alright, let us move on to turning Dirt into Farmland.
How To Turn All Types of Dirt Into Farmland
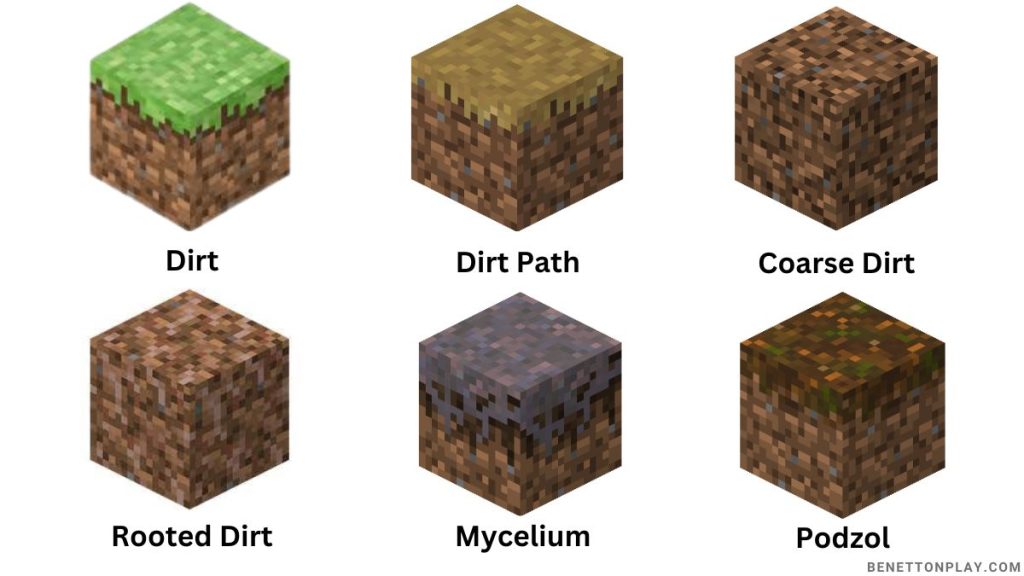
If you are a Minecraft player then you must be aware that there are a total of 6 types of Dirtblock in Minecraft and all of them can be turned into Farmland. You must turn a speck of dirt into farmland to grow your favorite crop.
We will tell you how to turn all types of dirt into farmland down below in this Minecraft Crop Farming Guide.
1. Dirt
This is the most common type of dirt block in the whole game and can be found anywhere. You will have to right-click on it once with a hoe to turn it into Farmland.
2. Dirt Path
This dirt block is found in villages and requires one right click with a hoe to turn into Farmland.
3. Coarse Dirt
Can be found in Badlands, Savannah, and Taige biome. Requires two right clicks with a hoe to turn into Farmland.
4. Rooted Dirt
Found under the azalea tree and requires two right clicks with a hoe to turn into Farmland.
5. Mycelium
Can be found in the Mushroom Fields and Taiga biome. Requires two right clicks with a hoe.
6. Podzol
Found in the same place as Mycelium and requires two clicks with a Hoe.
Also Check: The 10 Best Minecraft Star Wars Mods
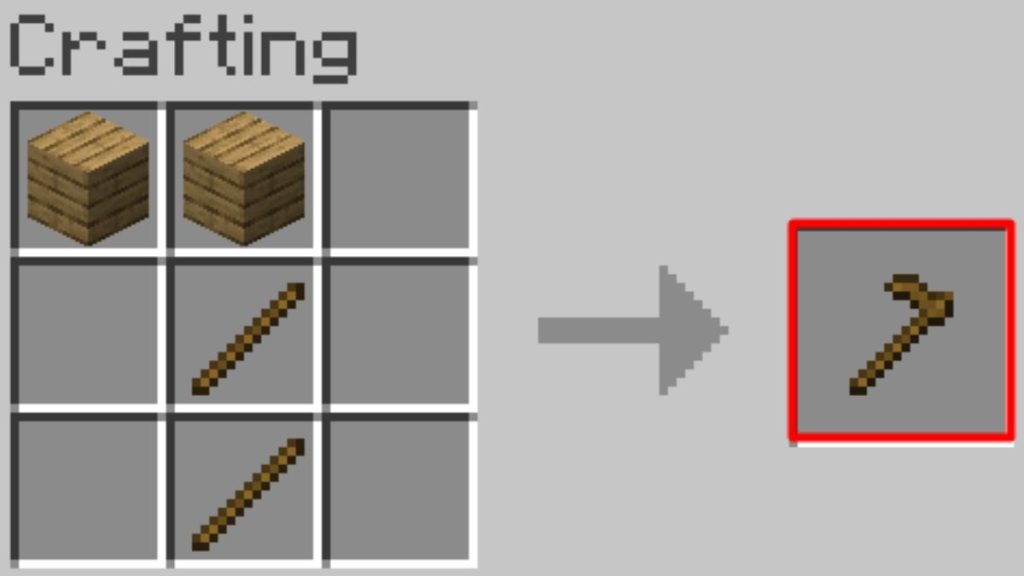
How to Craft a Hoe
A Hoe is the main tool for farming in Minecraft. You won’t be able to grow your crops without a Hoe so you need to learn how to craft a Hoe. Crafting a hoe is pretty simple as you can use any resource to craft it, including wood, stone, iron, gold, diamond, and even netherite. All you need to do is place two of the mentioned resources in the crafting grid along with a pair of sticks and you are good to go. It is that easy to pull it off. We will also provide you with a picture down below so you can understand better.
After you are done crafting your Hoe you can turn all your dirt blocks into Framland.
Minecraft Crop Farming Layout
So you crafted a Hoe and turned your dirt blocks into Farmland now you need to learn about Farming Layouts. We will list the Best Farming Layouts for you down below so that your crops can grow fast and healthy.
1. 9×9 Farming Layout
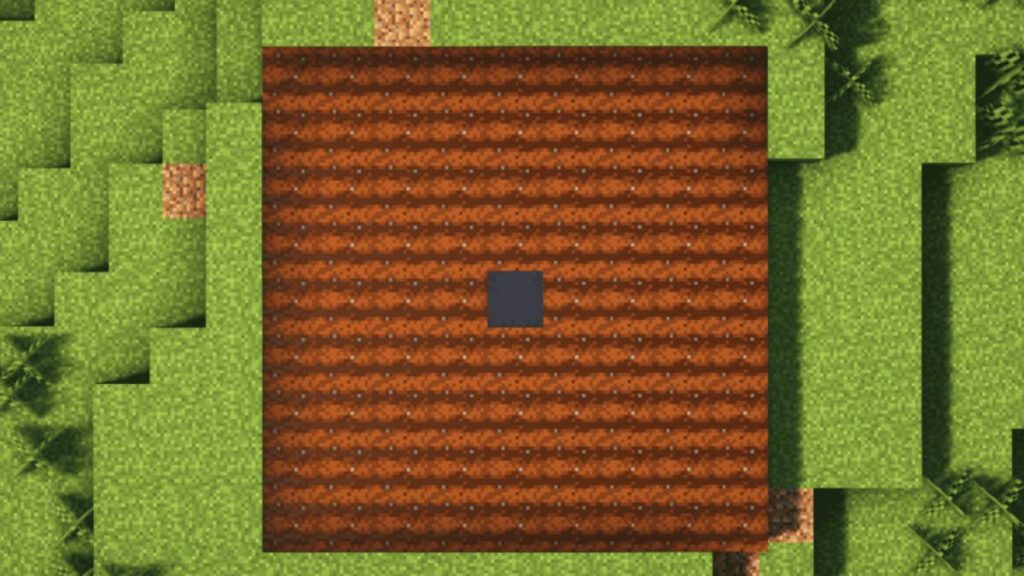
This is the most basic and simple Farming Layout in the game. All you need to do is tilt the dirt in a 9×9 shape and it will create 81 blocks area then you need to break the block in the middle of the layout and add water inside it. The water that you will add in the middle will provide moisture to all the 80 other blocks of Farmland. One block of water will be enough to moisturize the rest of the Blocks.
2. 9×9 Tower Farming Layout
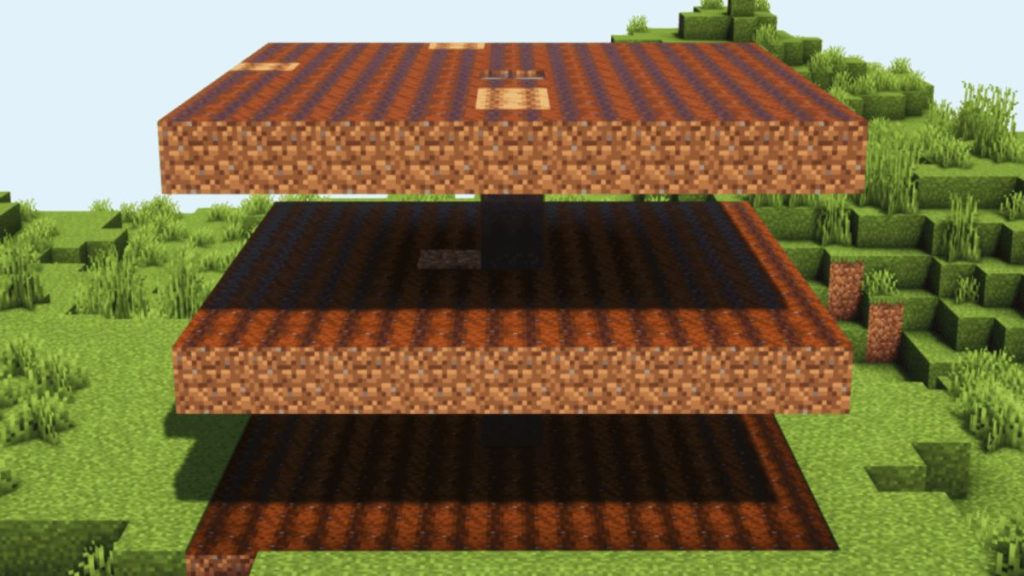
This is a bit modified version of the 9×9 layout. All you have to do is stack 9×9 layouts on top of each other as much as you want and just use one water block in the middle, that will flow down and moisturize all the Layouts.
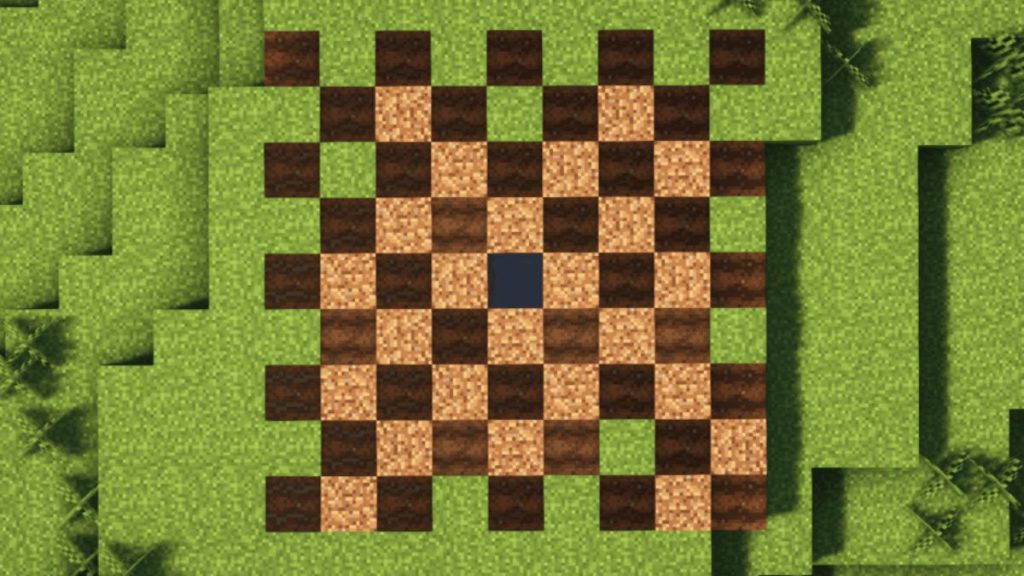
3. Pumpkin and Melon Layout
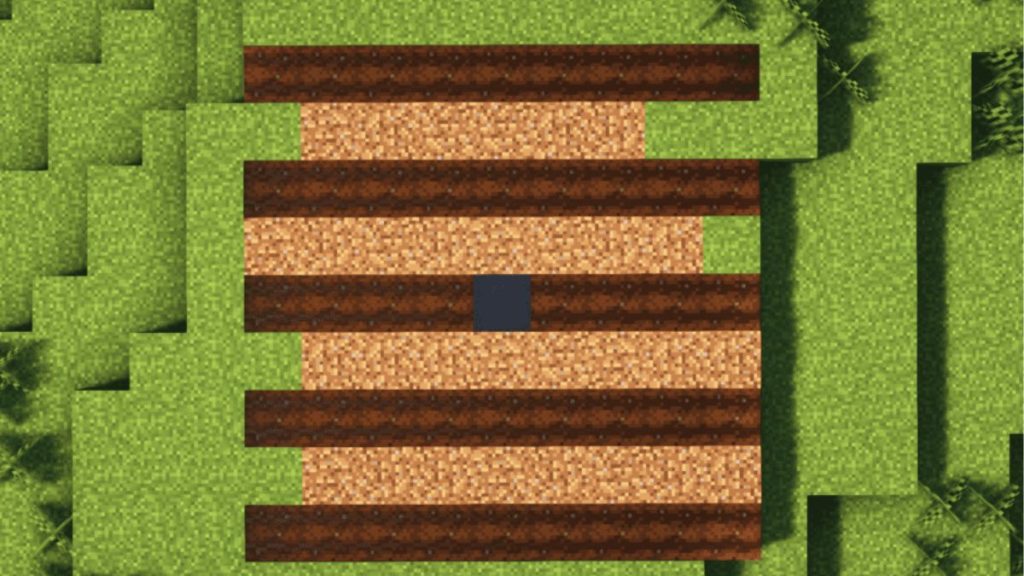
Pumpin and Melon are two crops that are a bit special so they can be planted in two layouts. The first one is called the Line layout which can be seen above and the other one is called the checkerboard layout which you can be down below.
After creating your farming Layout all you need to do is plant your crops in the layout.
Also Read: 10 Best Minecraft Launchers in 2023
Best Way to Grow your Crops
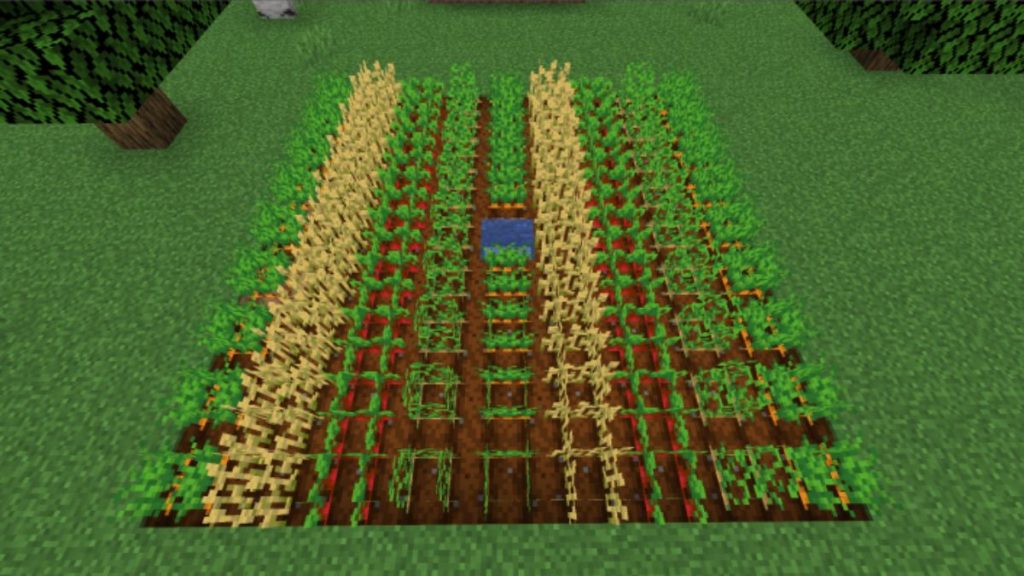
If you want to grow your crops fast and healthy then you need to provide them with water, and sunlight and plant your seeds in alternative rows. For example, if you decide to plant wheat in the first row, then use the next row to plant potatoes this method has proven to grow crops in Minecraft the fastest way.
But keep in mind to not use this method for planting Pumpkin and Melon as they grow more to the side of them. So that is why Pumpkin and Melons are grown best on the Checkerboard Layout.

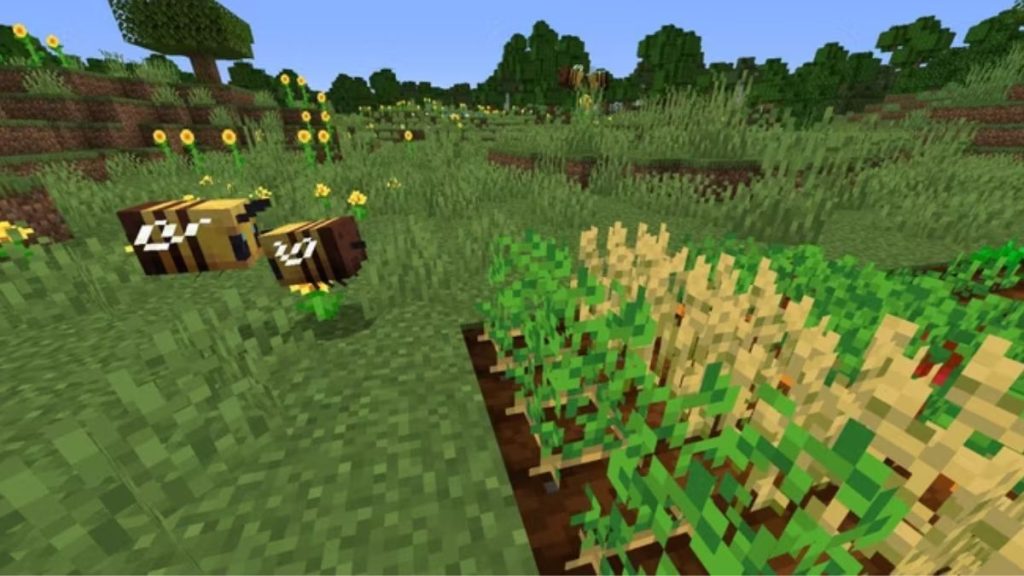
Another way to grow your crops healthy and fast is to build your Farmland near bee beehives as they would pollinate your crops. Pollination will help your crops grow much faster. We will provide a picture of bees pollinating crops below.
Do check out how you can Unleash your creativity using the Minecraft beginner’s guide to building.
Role of Lighting
Lighting is one of the essential elements while growing crops in Minecraft. You would need your crop to grow healthy and fast so for that, you need to provide it with lighting. If your farmland is outside where the sunlight reaches easily then it will be easier for you to grow crops as your crops will be exposed to the sun during the day time but if your Farmland is underground or inside a shelter then it would be hard but we have got a solution for you.
Your crops rely on two levels of light: The sky level and the block level. The sky-level light involves sunlight but if your Farmland is underground or inside a shelter where the sunlight doesn’t reach then you need to rely on block-level light.
The block light level must be 7 otherwise your seed won’t be planted in the dark. To increase the block light levels you can manually place light sources like torches, glow stones, sea lanterns, etc. around your Farmland.
Also Check: How to Rarest Items In Minecraft and where
Farming Without Water
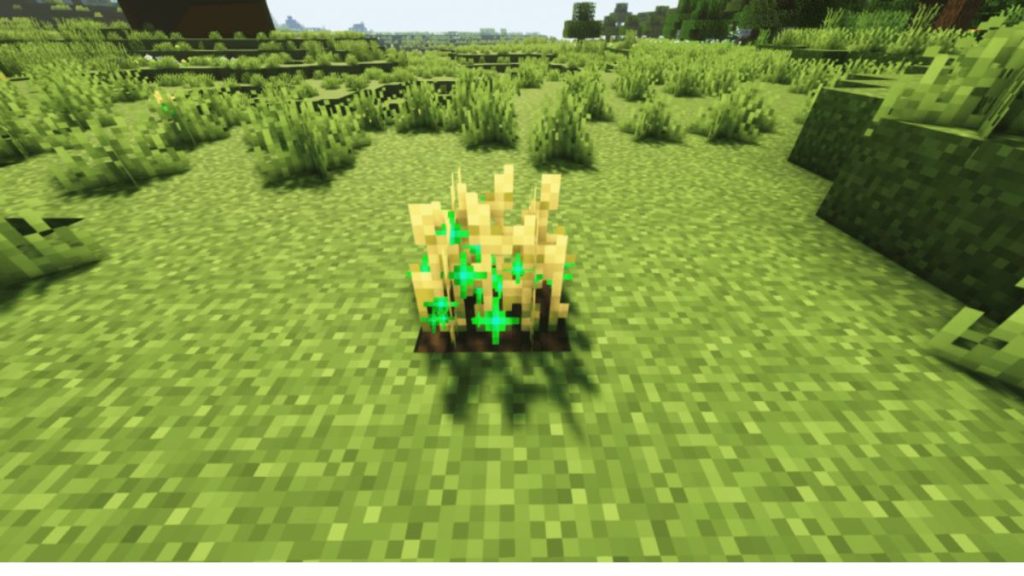
Water is really vital for growing crops in Minecraft but that doesn’t mean that you can’t grow crops without water. Yes, you can actually grow crops in Minecraft without water. Even if your Farmland is unmoisturized you can still grow crops on it but if you haven’t planted your seeds in the unmoisturized Farmland then it will eventually turn back into dirt over time. Also, the crops planted on moisturized Farmland will grow faster than moisturized ones.
So we would recommend you to build your Farmland with water as it would serve you longer but if you are in a hurry or in a place where you can’t find any water like the nether then you can always plant your crops without any water.
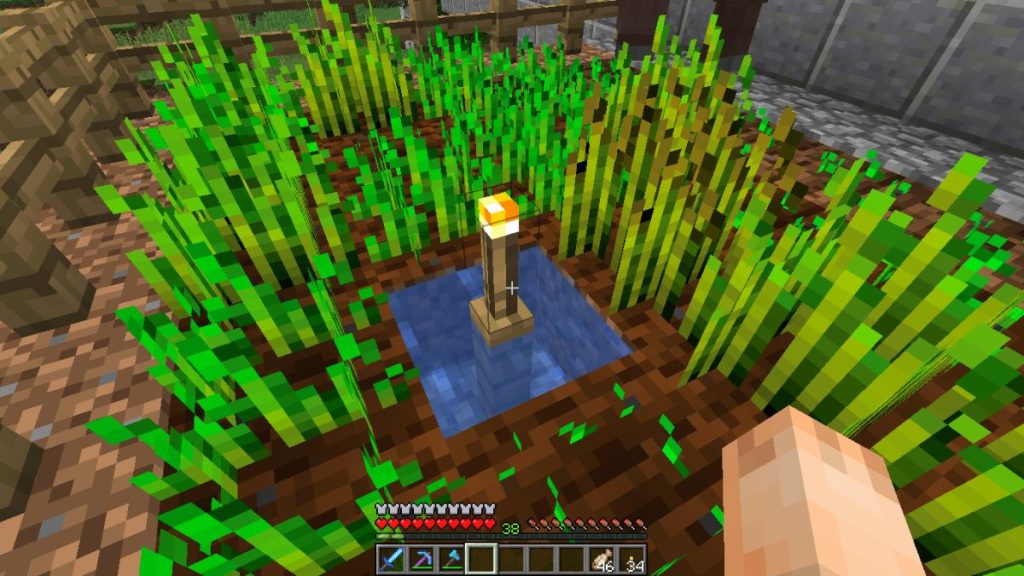
Covering Farm Water Blocks
Now let’s talk about covering up your water source in the middle of your Farmland. Now you might be wondering about what is the point of covering the water source in your Farmland. Let us Explain. For example, if you’re walking across your Farmland and you end up stumbling on your water source then it will make your character jump up on the Farmland and it will result in turning a block of your Farmland back into the dirt so it is best to avoid this situation by covering up your water sources.
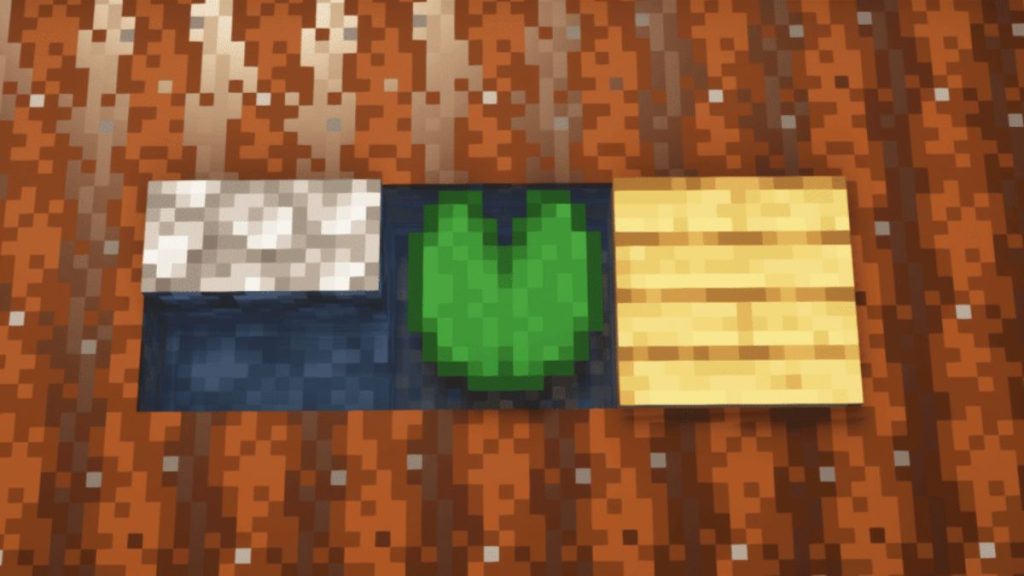
It is really easy to cover up your water block by using 3 items: Lily Pad, Oak Slab, and stairs. All you need to do is put any one of the 3 resources on top of your water block and it will cover it up just fine. You can also place your light source on top of the Oak Slab or Stair if you are farming without any light source.
We really hope that after reading this Minecraft Crop Farming Guide you will have a better idea about growing crops in the game. So now you can grow your favorite crops and have more food sources.
Frequently Asked Questions on Minecraft Crop Farming Guide
Now we will answer some Frequently Asked Questions
Is Farming possible without water in Minecraft
Yes, Farming is possible without water in Minecraft
When was Minecraft released
Minecraft was released on the 18th of November 2011.
Why is Minecraft So famous around the world?
It could be because the game lets you create a world of your own with your friends and do almost anything and also customize your world to your taste and preferences.
Which engine was used to power Minecraft
Lightweight Java Game Library Engine was used to power Minecraft